A mish-mash of random stuff I want to rant or otherwise comment on.
Work is ze crazies. Looking at a departmental reorganization which could mean any number of things for me and my coworkers, and there are too many ifs and maybes to be able to do anything but guess at what will come. I buried myself in my shaman this past weekend specifically to get my mind off the uncertainty. Fun times.
I built an elaborate cabinet thing this past week. It was one of those follow-instructions-with-labeled-parts constructions, with (mostly) pre-drilled holes, but it was fun. There's just something about building a physical creation with your own two hands that I think we sometimes miss when we spending so much time on computers. I'm now eyeing the space around my computer and plotting building storage space around it. It doesn't help that I've started following the Ikea Hacker blog. I want room to store (in a more organized fashion) all of the CDs, books, toys, and trinkets that otherwise clutter my (old dining table) desk.
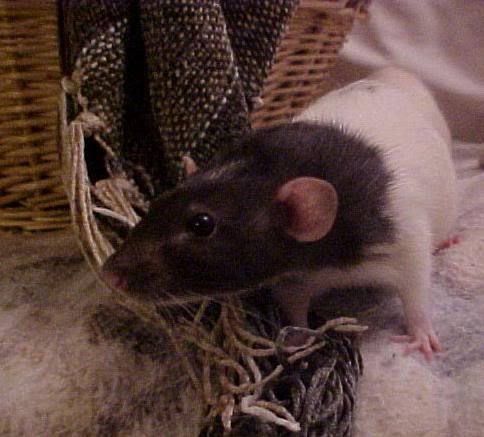
Speaking of the Ikea Hacker blog, this amazing hamster home is making me want to get another small furry rodent of my own. I used to keep rats while in college, and hamsters/gerbils while a teenager: I enjoyed building custom cages for them, though I still owe my Mom a wool coat from when my gerbils escaped one of my early attempts. The short life-spans were devastating to me, however, especially for the rats as they are so social (I miss my little girls), and my husband has forbidden that I get any more pets with a 2-3 yr or less life expectancy. He has enthusiastically agreed that we will get a dog (Malamute or mix) when we move out of our current no-dogs-allowed rental house, though!
If you liked Spaceballs and play D&D, you need to see this movie: The Gamers: Dorkness Rising. It is freaking hilarious. I have also played with each of those gamer stereotypes. I completely lost it when the sorceress raised their dinner from the dead... and it killed the bard. A must-watch movie.
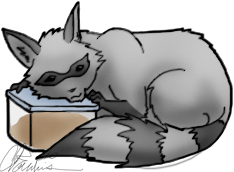
Speaking of roleplay games, here be a raccoon. With tupperware. She's a pen-and-paper roleplay character of mine ;) My GM is awesome and has let me play some very unusual characters, including a drow-werewolf ranger, wolf monk, and an axe-wielding earth mage of a geology grad student (she had a Jeep, too).
"Venezuelan leader Hugo Chavez Wednesday accused the United States of causing the destruction in Haiti by testing a 'tectonic weapon' to induce the catastrophic earthquake that hit the country last week." Wait, what? Okay, this is reminding me of a witch hunt: some group isn't either as affluent or well-off as another group/individual (or deserving of attention), and thus decides they must be either pacted with the devil (which has also been accused in the case of this earthquake) or otherwise they're involved in some horrible evil ulterior motive plot. The world is just plain weird. Nevermind thinking that an atmospheric research project dealing with the ionosphere (far upper atmosphere) would result in deliberate tectonic reactions. That's like blaming a resto druid for pulling aggro with a Berserked Mangle.
I plan to begin work on some large, false "stained glass" windows this weekend, using tissue paper and contact paper. Trying to decide what to do for the joints between the "panes," maybe use black paint since it'd be thicker than the ink from a sharpie. They'll ultimately be used as atmosphere for a summer camp I'm co-directing (thus they need to be easily portable and removable, hence the materials). I'll be dog-sitting for a friend at the same time; this'll be interesting!
I'm halfway through a 3lb. box of Russell Stover Bloopers. Thank goodness for a high metabolism.
Edit: my Blood Queen Strat can be found here. Take that, Miss Crazy Vampire Lady!
....ARGH.
Blood Queen has been very difficult for us. We weren't on our game on Wednesday, and put a halt to our attempts to give it a fresh go on Sunday, and our last attempt of the night was a sudden wipe with Blood Queen enraging and slaughtering us all at 0.8% health.
For us, as a ten-strict guild with limited gear upgrade access and fewer badges available (not to mention having to rotate players in a single instance limiting badges further per player), the enrage timer is our greatest foe. We can overcome and adapt to the mechanics, staying out of swarms and spreading out a bit while still staying in range of each other for aoe heals, but that enrage timer is killing us. What's further frustrating is that we (maybe) would've gotten the kill last night on that last attempt had a certain pair of players not been pacted (due to placement, melee and ranged), or they not decided to meet right on top of the resto druid (>.>) and kill her with the pact aura + damage splash, or that tree had decided to sacrifice her nourish cast (swiftmend/NS on cooldown) and moved away through the maze of other players, or the feral not decided to sacrifice that little bit of dps time to res her. And it still would've been close.
On the flip side, we get Festergut with a minute or more left on his enrage timer.
Is it the three-heals? I don't think it can be done currently with just two, especially with our lower health pools compared to those with 25-man gear. Is it the number of melee? Is it that we had no priest and had to use fortitude scrolls? Was it just poor luck on who got shadow swarm and lost dps time? Was it a hiccup in the bite rotations, or bite timers coinciding with (still unreliably timed) P2 phases? Is it bloodlust timing?
Was it all of these?
Either way, Blood Queen has earned Vortex's wrath, and to see the silver lining, it will be all the sweeter when we finally topple her (and I turn her into a stick figure).
Rawr.
On an unrelated note, I went on an insane leveling spree on my poor shaman alt (who is as old as the Turalyon server itself), taking her from 43 to 73 in the past weekend (Thurs - Sun, plus some time on Thursday of the previous week). The dust is blown off and poor Stardance has seen the light of day. I've slowed up her leveling to pull my husband's old pally along with her through the quests of Northrend :)
Don't have time at the moment to write up a full strat-thingy, but I did want to alert others to something that worked very well for my guild last night.
Most strats for the Blood Council suggest using a caster tank on Prince Keleseth. We tried this out with our warlock for many attempts, using three healers (one assigned to each tank), with me as the mobile resto druid chasing our noble warlock all over the room as he tanked Keleseth and attempted to round up the shadow orbs. Most of our wipes were from him dieing: it was very difficult to keep him topped off all the time even with his 29k health, and sometimes he'd just get one-shot.
It was suggested that we try having someone with a higher health pool tank the prince, and see if we can handle having 3 melee tanks.
So it was that our feral druid with 55k health in bear stepped up to the plate to tank Keleseth, and within two attempts, the Council was down. Caster tank? Didn't work for us. Bear tank instead? I chased Mr. Scythe-bear up and down and all over the room, him calling out to me when he was going up on the platform or having to go really far so I could anticipate and chase after him through a maze of fellow raiders (gotta stay spread out), fireballs, sparks, and mess. And it worked. He took some big hits, but with that health pool and his survival instincts/barkskin, he was able to stay alive.
Edit: looks like the bear-strat worked out for Virile at Rejuvo, too!
Putricide is the wing-boss for the Plagueworks in ICC. He is a combination of dps-race, environmental awareness, vehicle (for one player), and healing-intensive fight.
Video of the Hardmode at the bottom; used a slightly altered strat.
Raid Makeup:
2x tanks
2-3x healers (we used 3 for first kill)
5-6 DPS
This is not a very melee-friendly fight. The more ranged dps you can bring, the better.
The Pull:
For the first two phases, you will only be using 1 tank. Your second tank will turn into a (friendly) abomination by drinking a potion from the table behind the boss as the raid pulls, and will spend most of the fight in this form.
DO NOT cleanse your abomination tank; this will remove their abomination shapeshift. It will appear as a debuff, but do not cleanse them!!
P1 and P2 of the fight (up until Putricide reaches 35%) will be spent with the raid swapping back and forth from one side of the room to the other, staying on the side farthest from where the next ooze add will spawn. For this reason we found it easiest to pull on the left-hand side of the room, since the first ooze add spawn will always be the green ooze on the right-hand side.
Things to avoid:
P1-P2-P3: Slime Puddles: straight-forward green puddles of pain. These are thrown out periodically (two at a time) at random players. Do not stand in them unless you're the abomination. They steadily grow larger; the abomination will be eating these puddles (yummy) to make them go away and power the abom's own attacks. Aboms: you can only eat slime that you're standing on; you will have to reposition yourself closer to the center of a large puddle as you eat it away.
P2-P3: "Flasks:" these orange gas-bombs are placed in melee range, 2 at a time, and will explode 20 seconds after they are placed down. They look like flasks on the ground radiating an orange-brown mist. The flasks themselves have a damaging, hit reduction aura before exploding; the explosions will hurt anyone caught in them. When you see these go down, kite the boss to the other side of the tables, away from the flasks, and stay away from them. The explosion does a hefty chunk of damage and reduces your +hit by 75% for 20 seconds, so these NEED to be avoided.
MELEE: Putricide's hitbox is very large; be sure to make use of this large hitbox when staying out of slime and flask-gas. You can refer to melee combat pets' attack spacing to get an idea of what the melee hitbox is.
P2-P3:Malleable Goo: a glob of green jello-like substance is hurled through the air at a random player, bouncing along until it reaches where it target had been standing, where it will then explode much like the gas-bomb-flasks. Does a hefty chunk of damage and doubles your casting times for 20 seconds, so these NEED to be avoided. If you see one flying through the air, call it out in warning so all the ranged can move away.
Oozes:
These are a key ingredient to phase 1 and 2. Oozes spawn one at a time, green on the right and orange-brown on the left; they must be destroyed as quickly as possible. You will want to be on the far side of the room from wherever an ooze spawns, to give maximum distance it must travel before it reaches whoever it decides to target. Oozes will not target the MT or the abomination. Once the ooze is dead, dps can return to killing Putricide.
Green ooze:
Spawns on the right-hand side of the room, and is the first ooze to spawn.
Explodes on the player if they reach them, then switches to a new target.
Explosion damage is split among nearby players, so less dangerous if shared by more people.
Once a green ooze spawns, the abomination can use regurgitated ooze to slow it, while all ranged dps should switch to attacking it. Once it has selected a target, the melee can run in and start dps as well; avoid running over before it has selected a target, or it may choose one of the nearer melee. The rooted target can still cast spells and attacks; they just are unable to move from their spot.
When the green ooze nears its target (assuming it does not die before it reaches this point), the dps and healers should GROUP UP on that target to share the explosion, preventing anyone from dieing from the blast. The pile of players will be knocked back, and then the ooze will choose a new target: being dpsing it again immediately, and repeat should it reach that target, as well.
Avoid grouping together too soon, or your rooted player may end up stuck under a double-pool of slime along with the rest of the raid, and players will very likely die under the combined damage.
Once the green ooze is dead, the ranged all need to move to the right-hand side of the room while dpsing Putricide. Orange-Brown Ooze:
Spawns on the left-hand side of the room.
Does not root its target.
Stacks a gaseous bloat debuff on its target that slowly ticks down from 10 to 0.
If it reaches the target, deals damage to the raid (not split) based on the number of bloat stacks.
Switches to a new target if the bloat stacks reach 0.
It's technically called a gas cloud, but it certainly looks like an ooze! This is one that must be kitedby its targeted player around the room until it is killed. If the player's gaseous bloat is near to dropping off, call it out and have all melee dps retreat a safe distance away, since the ooze will target a new player once the debuff wears off.
Again, the abomination can cast regurgitated ooze on it to slow it down. The raid does not need to group up on the player being targeted by this one; just dps and heal away while the targeted player flees. Once the orange-brown ooze is dead, the ranged all need to move back to the left-hand side of the room while dpsing Putricide.
Resto druids: as Keeva pointed out, aboms do proc energy returns off of Revitalize. Keep a rejuv running on them as much as possible (assuming you have the talent).
Transitions:
At 80% and at 35%, Putricide will stun the entire raid while he goes to the table to buff himself. Phase 2 begins at 80% and introduces the Gas Bomb Flasks and Malleable Goo into the fight; Phase 3 puts a halt to the ooze spawns and starts the true "burn him quick!" phase with necessary tank swaps.
When you approach the 38% mark, halt all dps and dots on Putricide, because transitioning while a slime is up will cut uncomfortably into your dps time on Putricide. Wait until you have JUST killed a slime before pushing Putricide over the 35% transition mark! It will make your phase 3 much smoother if you do not have an ooze add to worry about killing at the same time.
Phase 3:
Your abomination will need to shift out to his usual tank form for this phase, meaning that the slime puddles on the floor will eventually overtake the room. Putricide has increased his own attack speed and damage by 50% compared to previous phases, and will be stacking a debuff on the tank that causes increasing raid-wide damage as it stacks higher and higher. Unfortunately, it also heals Putricide once the stacks drop off of a tank.
We had our tanks swap at 2 stacks.
This phase is all about burning him down as fast as possible before the slime puddles leave you with nowhere to go. He will continue to toss:
slime puddles
gas bomb flasks
malleable goo
...which must be avoided. Try to stay somewhat near each other to aid in AoE healing, and don't get cornered! The tanks should slowly kite Putricide around the room to avoid flasks and slime puddles, moving from clear space to (semi) clear space as they can. Always be looking for your next escape route through the growing slime!
I've healed, and I've tanked. I tank less often than I heal these days, but that's just a factor of what role my guild needed me in when entering the expansion. I love my tanks. I know a good tank when I see one in a pug. I also try my best to work with them to make their jobs easier, because there's more to healing than casting spells at health bars.
1. Stay behind the tank. If you are unfamiliar with the instance and might aggro something, stay behind the tank rather than running ahead. I think Ram wanted to kill me after I bounced ahead up the road in my first PoS run and was suddenly in combat with mobs that I thought would've had a longer aggro range; don't run ahead of the tank unless you're absolutely sure of what you're doing. If you do aggro a new pack of mobs, that's your own fault. As a note for pugs, be wary of DPS that look like your party's tank as they might run ahead, aggro a pack, and then dump aggro on you as you start healing.
2. If you have aggro on a melee mob, run to the tank. Don't run away from the tank. They are, for the most part, melee characters with a limited range on their taunts, and they're working at the same time to maintain aggro on the dps targets. Do your best to avoid cleaves or breath attacks from other mobs when doing so.
3. If you have aggro on a caster mob, try to LoS it to the tank. LoS (Line of Sight) is your friend; use it to hide from caster mobs that are trying to shove fire balls up your robe. Preferably have the LoS bring the caster past or near the tank, so that they can more easily pick it up as it runs.
4. If the tank is using LoS to pull, you need to LoS, too. Stand with or slightly behind the tank. Any heals (hots) that occur while the mobs are running over will establish aggro on yourself before the tank has had a chance to hit most or all of the mobs, so you need to be proactive in helping to bring those mobs to the tank via LoS.
5. Don't stand in cleaves or fire novas or breaths or similar tank-only effects. That's not aggro. That's standing in bad stuff. Don't do it. Reposition yourself so that you are not in the cleave/breath/whatever. If your tank is going crazy and dragging stuff all over the place having it cleave or breath on the dps, then smack them upside the head. If you are moving yourself and jumping into the cleaves, that's your own fault.
6. Remind them to hold up if you really need to drink before a pull. Something as simple as "OoM" or "Mana" in party chat should be enough to halt a tank in their tracks. If there is lots of party-chat discussion, you may need to add emphasis to make sure it's not lost in the scroll of chatter.
7. You will have aggro on anything the tank hasn't been able to touch. Healing aggro is not a problem on mobs that a tank is able to work on (melee range), but during an initial pull of mobs, you will very likely get aggro on something. The "initial aggro" generated by the player who initiates combat with mobs is not very much, and healing will overtake that threat quickly. This includes situations as, listed above, need to be LoS-pulled. This also includes mobs that some dps happened to get too close to, and the tank may not be aware that they've been aggroed. Run any aggro to your tank, or position yourself so that they will cross the tank as they are running to you; if your tank is at all attentive, they will rescue you.
8. (Druids:) Innervate your Prot Pally. If they're OoM (or near to it) and your mana is fine, innervating a prot pally tank is a great way to reduce downtime during chain-pulls or, if extra stuff is pulled before they can drink, to make sure they can hold aggro against everything. An OoM pally-tank can't keep aggro against high dps, and your innervate will overflow their mana pool!
9. If you had a great tank, thank them. Sometimes I get thanked as a healer for what I thought was a light job. I smile and say, "My job was easy... x was a good tank" (or something to that effect). Sometimes I have an insane job, and I get thanked, and I know that the tank should be thanked, too: such as when I ran a heroic HoL with a prot pally who had 25k health, and we accidentally pulled the first boss (while charged) and an entire pack of trash at the same time. The tank was very low in gear level, but he picked it all up before it could kill me and used his cooldowns to stay alive while I poured heals on him and the group. I knew it wasn't all me: that tank was a great tank in spite of his gear, and our dps was wise enough to let him build aggro. It was the best pug group I've ever been in, and we had no deaths through the whole run. I made sure that tank knew I appreciated it, too. Tanks don't get thanked enough.
10. Communicate with your Tank. Tielyn commented with this great addition. "Communicate with your tank. Warn them if your gear is a little light. Or tell them they can go all out. There is nothing worse than landing in a random PuG with a tank that says, "I'm a gonna chainpull, kk?" That is your one chance to speak up and tell 'em 'No, I don't think I can handle it.' If you don't, it really IS your fault.
If they insist on pulling when there's no LOS to you, however, it's probably their fault.
Conversely, when I tank, I look at my healer. And I ask him or her, 'I see you've got 22K mana and what looks like mostly T9 gear. We good to speedrun this puppy?'"
 Resto
Resto Balance
 Feral
Feral